March 2025 Vlog
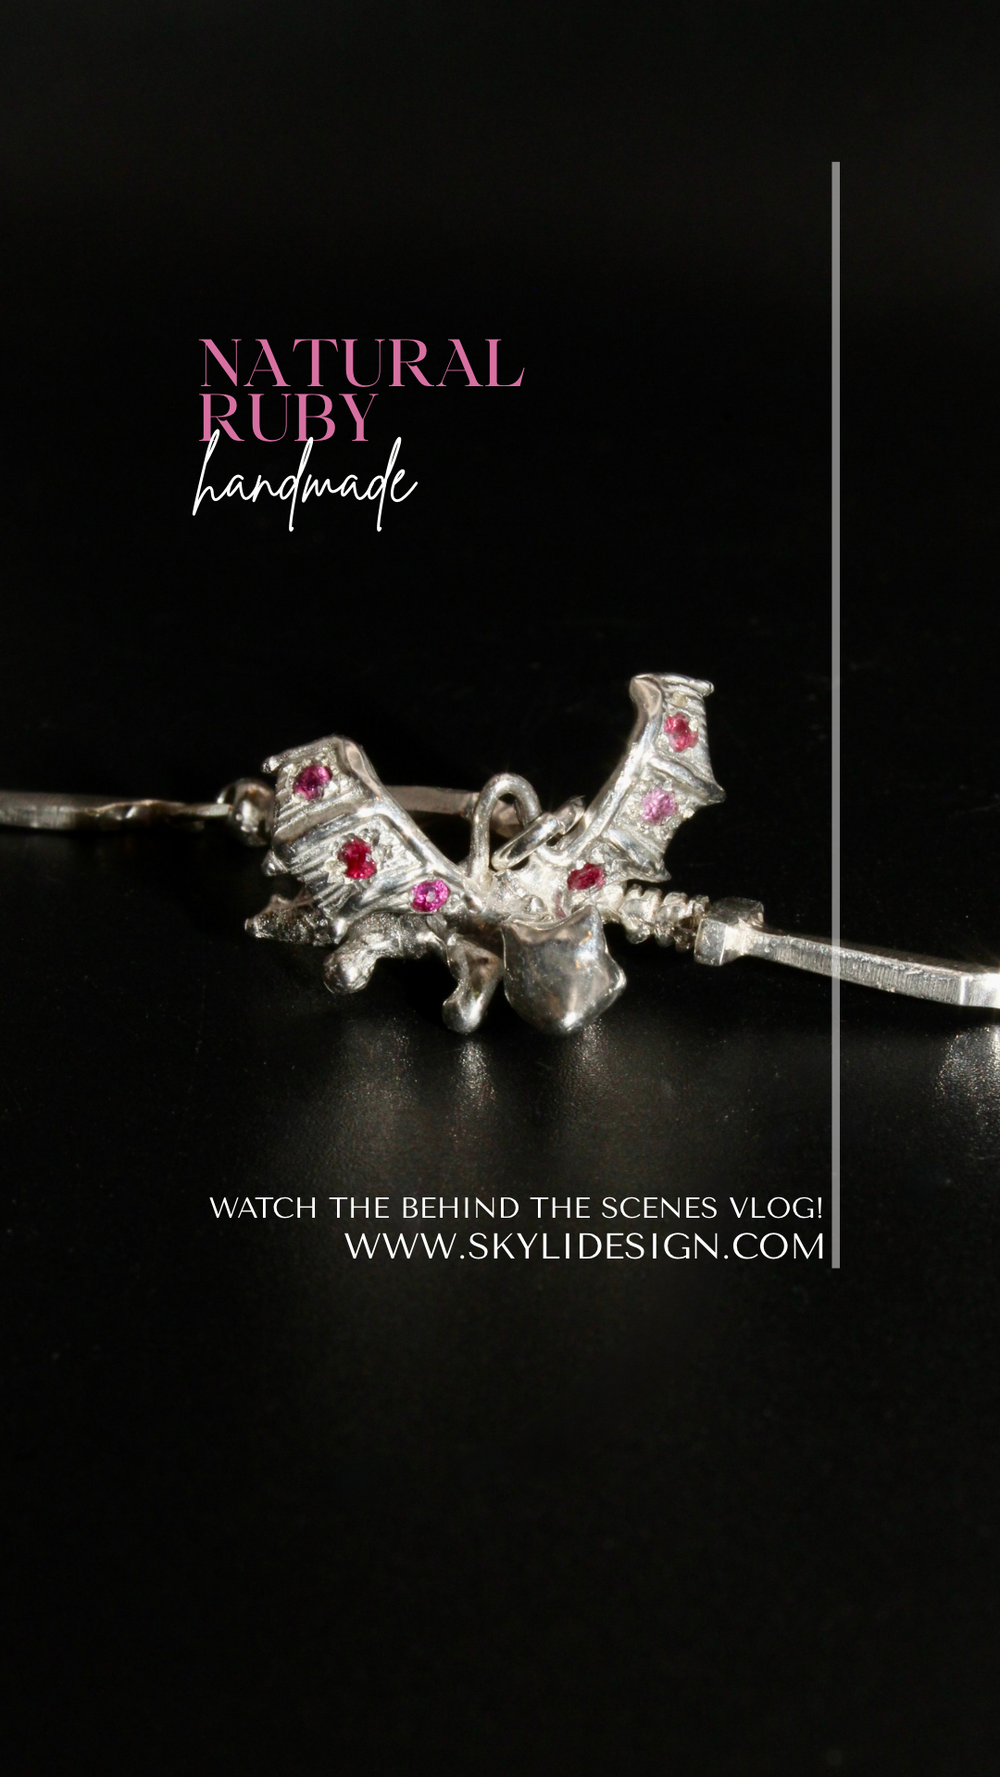
Dragons have always fascinated me—they symbolize strength, transformation, and a bit of mystery, all things I love bringing into my jewelry. For this piece, I wanted to create something special: a sterling silver dragon with rubies set in its wings, adding a subtle but striking touch. In this blog, I’ll walk you through the process, from hand-carving the wax model to setting the final stones. It was definitely a labor of love, and I’m excited to share the journey with you! Be sure to check out the vlog located at the end of this article.
Wax Carving: Bringing the Dragon to Life
Every jewelry piece starts as an idea, and turning that idea into a physical form takes time and patience. A few years ago I had sketched some dragons that had a cartoon feel to them. I began with a drop of wax, carefully adding to create the main body shape. This part of the process is always a mix of fun and challenge—refining tiny details like the wings and expression takes a steady hand and a lot of adjustments along the way. I wanted to give this dragon a sense of movement and personality, and after a few tweaks, I finally had a wax model that felt right.
Molding and Casting: Turning Wax into Metal
Once the wax carving was finished, it was time to create a mold and cast the piece in silver. The wax was encased in a rubber like material that hardened into a mold. The cutting process is difficult and after the wax is cleaned up it is sent to be cast right here in New Mexico. I casted this piece in sterling silver.
Cleanup and Refining the Casting
When the casting came out, it was rough and unfinished, as expected. The next step was carefully cleaning it up—removing excess metal, filing down rough areas, and refining the details to bring the dragon’s form to life. It’s a slow, steady process, but seeing the piece slowly transform with each step is so rewarding.
Setting the Rubies & Final Polish
With the silver cleaned up, it was time to add the finishing touch: setting the rubies in the wings. I love how gemstones can change the personality of a piece, and these pinkish rubies added just the right amount of contrast and uniqueness. After carefully securing the stones, I gave the piece a final polish, bringing out the shine in the silver and making every detail stand out.
The Final Piece
After all that work, seeing the finished dragon felt incredibly rewarding. Every handmade piece has its own journey, and this one was no different—there were challenges along the way, but also a lot of excitement in bringing the idea to life. I added this charm to one of my mini Bowie knife bracelets. It is now ready to be purchased and cherished in a jewelry collection!
If you’d like to see the full process in action, check out my vlog where I go through each step. I’d love to hear your thoughts—what do you think of the final piece?